In this guide, we walk through the steps to install and configure the Outlook app on an Android phone, including how to move it to the home page and sync contacts.
Using Microsoft’s application for emails often works better than the generic mail app that comes with the phone. Syncing businesses’ contacts straight to your phone when you have already synced them through Office 365 is also beneficial.
How to Install Outlook app on an Android phone
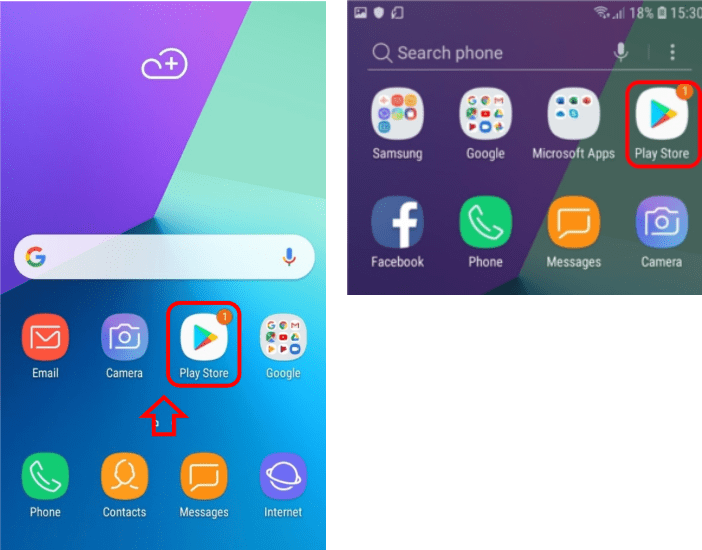
Step 1: Open the Play Store
If you haven’t installed the Outlook app yet, open the Play Store. If it is not on the home page, slide a finger from the bottom to open Apps.
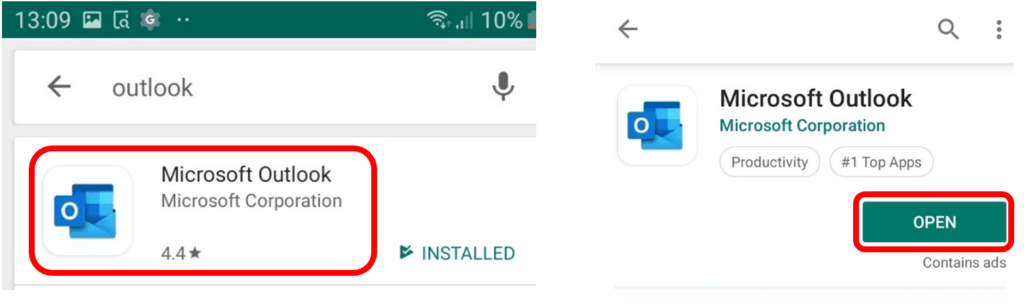
Step 2: Search for the Outlook app
From inside the Play Store, tap on the search icon(the magnifying glass symbol), type in Outlook and hit Go to search for the app.
Step 3: Open Microsoft Outlook
Select Microsoft Outlook from Microsoft Corporation to open the app’s page. From here, select Install.
Once finished, it will change from Install to Open.
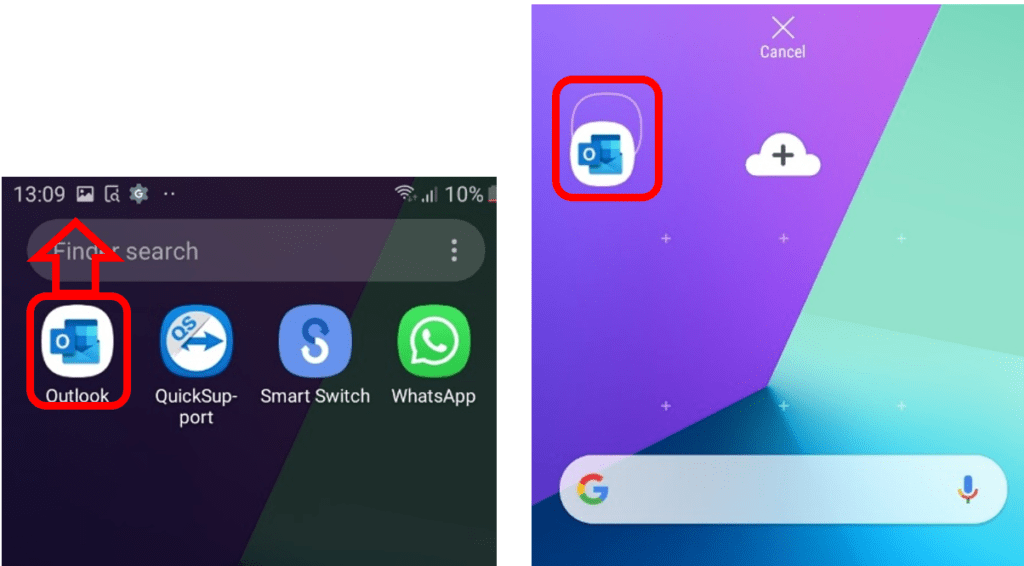
Step 4: Find and drag Outlook to your main screen
Pressing the Home button will return the phone to the main screen. From here, open all Apps again and look for Outlook.
Hold a finger over the app and slide upwards slowly, dragging the icon from the Apps page to the main screen.
Dragging is a helpful method of moving apps around, making searching for them more accessible.
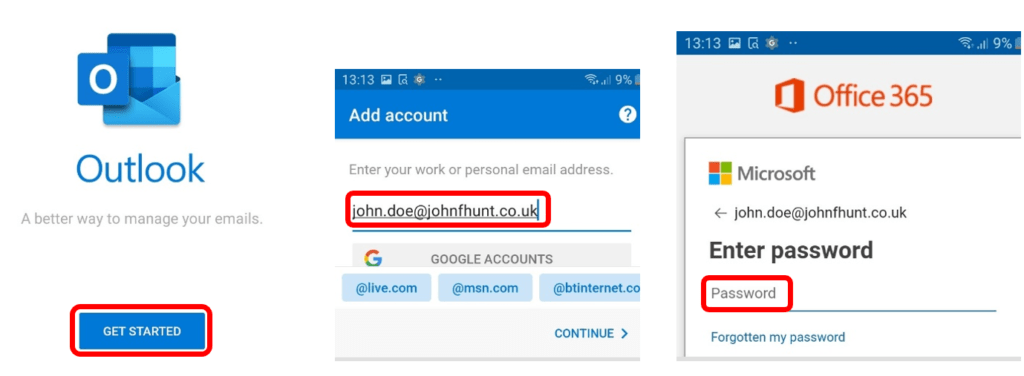
Step 5: Open Outlook and get started
Open the Outlook app and select GET STARTED.
Enter the email address and password.
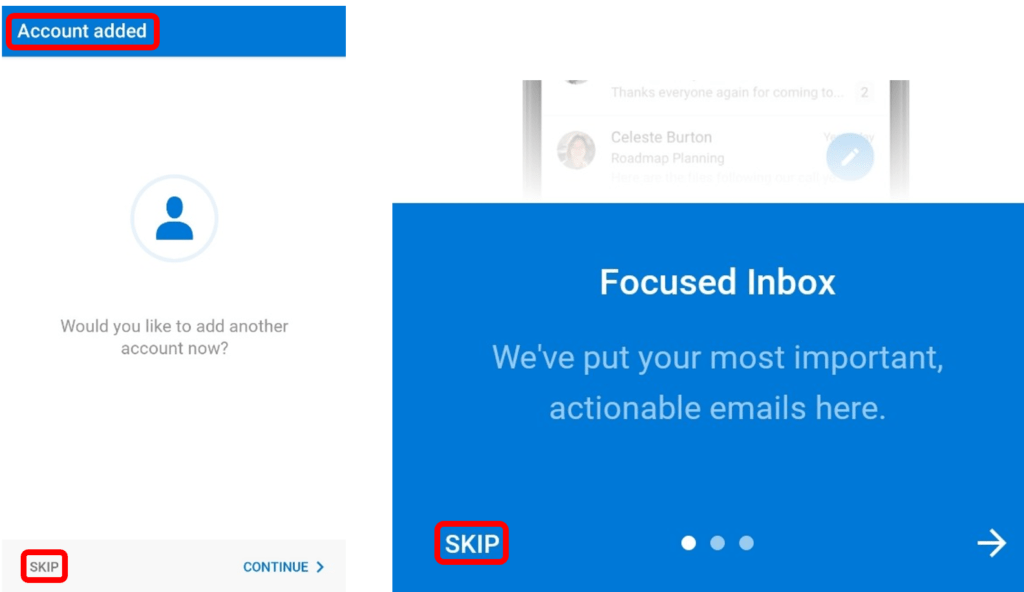
Step 6: Skip tutorials to access your inbox
Having successfully added the account, select SKIP unless there is a need to add another account.
SKIP again passed the tutorial on how to access your inbox Inbox.
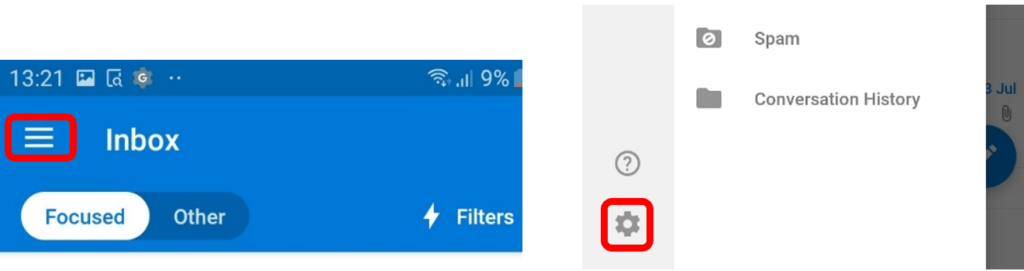
Step 7: Select three lines and then the cog icon
Now that Outlook has been set up to receive emails, we will go through how to Sync contacts from Office 365.
Select the three lines at the top left and the settings cog at the bottom left to access the settings.
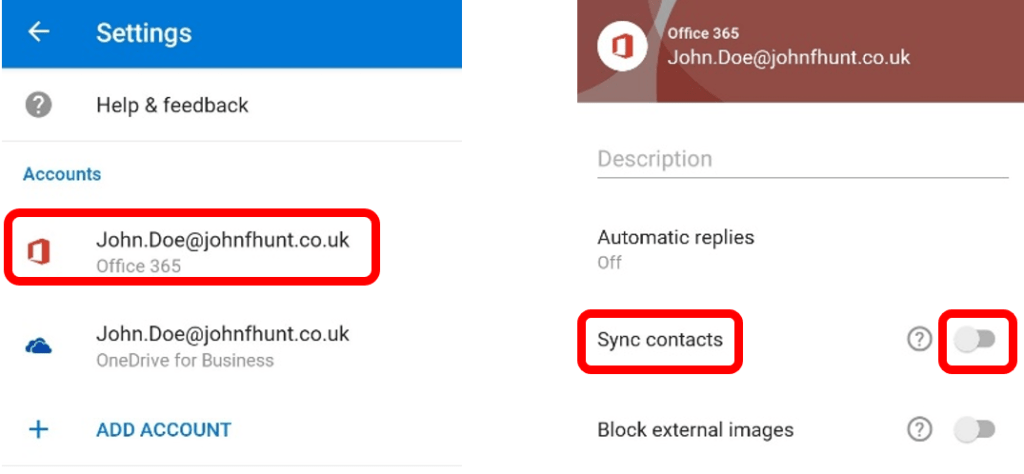
Step 8: Select your account and sync contacts
Select the Office 365 account and then move the slider next to Sync contacts to the right.
The phone’s contacts will display all of the synced contacts from Office 365.
Read more: How to Set Up a Mobile Hotspot on Android: A Simple Guide
Lets Talk!
If you have additional comments or questions about this article, you can share them in this section.